Thursday, 26 February 2015

6 Ways To Up Your Social Media Game.


Social media is the number one way of driving traffic to your blog; I spend my days tweeting, instagramming pictures and pinning the latest scandinavian style interior picture to my Pinterest account. Recently though, I've been a bit slack on the whole blog promotion front, so I thought I'd talk through ways I'll be trying to up my social media game. We're in time where not only do clients want you to have a good social media following, as well as blog followers, but people even get paid to tweet ads for companies, so the amount of Twitter followers you have may be more influential than you think.

I've decided to start dedicating certain times of the day to posting on my social media accounts. Of course, we don't want to have all our tweets or instagrams heading up at the same time, so there's some great scheduling tools you can use. My favourite to use is Hootsuite which is free, but there's also Buffer which can be used for various social media. But on your Facebook page you can schedule posts too, and you could even set little alarms on your phone to remind you to get pinning or tweeting! I like to do it first thing in the morning after my posts have gone live at 8am, and then schedule more tweets throughout the day. 

Get involved with people! Follow others and engage with what they're saying, rather than just tweeting your own links - nobody likes a spammer! A great way to really get involved online are with the blogger chats, of which there are so many of these days. Sophie posted a great list of them here which I like to keep bookmarked so I don't miss the ones that interest me. Being friendly and adding your own thoughts and opinions to topics and conversations will get your Twitter noticed, and eventually your blog noticed too. 

Twitter isn't just a place to rant about public transport, or solely publish blog links. Make sure the people who are following you on Twitter or Facebook are also following you on Instagram and Pinterest, if they'd like to, of course. A simple "Join me on Instagram!" with a selection of your latest 'grams and the link would suffice, or post individual pictures with a link back. 

It has been claimed that tweets or facebook posts that include a picture are over twice as successful, in terms of reach and engagement figures, as posts with words alone. I know I find this to be true with the majority of the things I put out on social media, so making an effort to add a picture to your latest blog post link can make it stand out more. Also, rather than just selecting 'Share to Twitter' when I instagram pictures, which just shows the link to the image, I'll add it myself later with the actual picture showing and a link back.

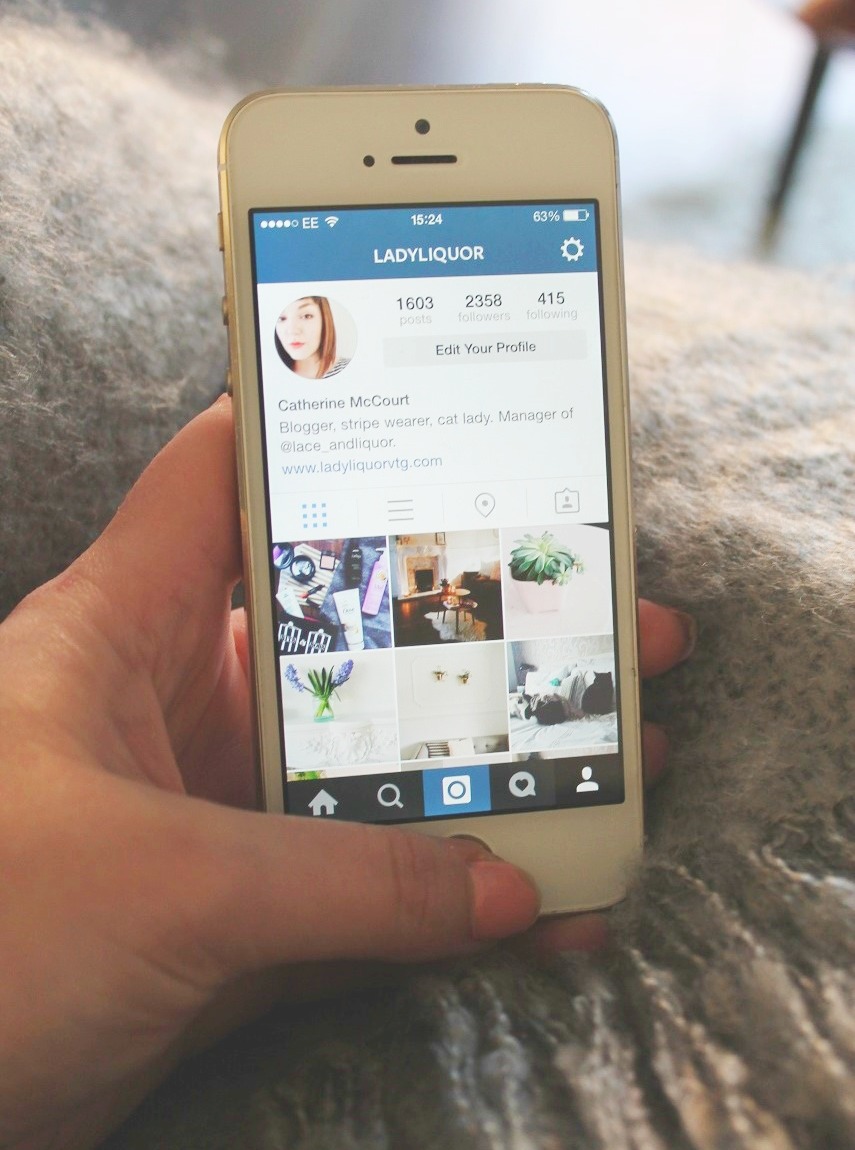
Usually, the first thing someone looks at when going on any of your social media accounts is the picture, and bio. Make sure they're updated regularly, and make them interesting and personable. I wish I was funny enough to add a bit of wit into mine, but sadly that doesn't come naturally enough to me. Twitter has recently added in the header photo, which is a great way to promote blog images. Make sure you have your blog links and email available also, so pr's can find you if they'd like.

This is less of what you can do on social media, and more what you can do to make your blog posts more easily share-able online. I've recently added both to my blog, and it's actually quite intriguing seeing what people pin of my images to their Pinterest accounts. The button automatically creates a link so all the images track back to your blog. If people find your content interesting, the share it buttons are a great way to let them post it on their various social media accounts. If they do, make sure you follow the earlier points and thank them, or get involved in a conversation about the post with them.

How do you create a traffic flow from social media to your blog?


Share this Post Share to Facebook Share to Twitter Pin This
SHARE:

Wednesday, 25 February 2015

A Bedroom Refresh.


A couple of weeks ago I sat in my bedroom and felt pretty unhappy with how it was looking. Everything looked a bit mismatched, I wasn't keeping it particularly tidy, and it just wasn't feeling how I should in a bedroom. So after a bit of Pinterest inspiration (of course) I decided on a colour theme, had a bit of a rearrange, and added in a few new pieces.

First up was adding the crate and wire picture display to the walls; I was a bit unsure of whether to do this at first, but I really like the look it creates, and considering all I had were open white walls beforehand, it adds a bit more interest too. They go in well with the white/gold/copper/pink colour theme I've got going on too, as well as adding a bit of height above the chest of drawers. On top of them I popped on a few books in those colours, a peace lily, my old 1950s Metamec lamp clock and my copper pineapple, which is a perfect way to keep things a bit tidier.

I also made the extremely difficult decision to put my Made Austin Table Lamp on the bedside table, and I'm waiting for another one to arrive for the opposite side. I like the flooring in the room but I think adding a simple faux sheepskin rug adds a bit of extra comfort in there too.

There's still a few more pieces I'd like to add in, but overall I'm feeling so much happier with how it's looking in there.

What do you think of the changes I've made?


SHARE:

Tuesday, 24 February 2015

A New Night-time Essential.


When I first heard of the new Drops of Youth Bouncy Sleeping Mask* from The Body Shop, mild confusion set in; bouncy is something I long for my hair to be, but not so much my face. That said, I'm a sucker for anything to add into my evening skincare routine, especially if said items claim to hydrate, smooth, and replenish the skin.

Starting off, it wasn't plain sailing; the texture, putting it frankly, is the weirdest thing I've ever felt in my life. It's like a thick jelly, and is pretty much impossible to get out of the tub; it does come with a mini spatula, but me being me lost that pretty rapidly. Once you get a hang of picking up a tiny bit, it's not too bad, and you only need a small amount to spread all over the face. And once it does spread, it feels really nice and light on the skin, so sinks in quickly - I hate being nervous of products ending up more on my pillow than my face!

Inside, there's a variety of wonderful ingredients all to work some magic on the skin overnight. The main one TBS are talking about is Edelweiss stem cells which have strong antioxidant properties, as well as doing a pretty good job at protecting the skin, thanks to having grown in harsh conditions itself. It also has some oils in there to help hydrate, and caffeine to energize and awaken the skin. It does have some fragrance and silicones in there too, so if you know they aggravate your skin you may have to be wary, but I have acne prone skin and have no troubles with it at all.

At £22 a pot, it's not the cheapest thing from The Body Shop, but it is a 90ml tub which is pretty huge; I've been using it for weeks and have barely dented it at all! It really does what it says on the tin (or box, rather); I wake up with smooth, soft, hydrated, and glowing skin!

What are your favourite skincare products from The Body Shop?


SHARE:

Friday, 20 February 2015

Office Updates.


Being in Pinterest a lot, I have a pretty good idea of what my ideal office space looks like; it has a desk you can come sit at which isn't against a wall, with a sofa and other seating on the other side. It's filled with flowers, prints, stationery, and most of all, it's a a nice open space. Sadly, working from home with my online vintage shop, my office has to double up as a stock room, so whilst I'd love it to be more open, I currently have three large rails of clothing, two shelving units and a desk in there, leaving just enough room for a rug on the floor.

I've tried to make the space as appealing as possibly to work in, whilst also being practical for storage. The IKEA Kallax (previously Expedit) shelves seems like a perfect compromise so I can use the shelves and the Drona boxes so I can keep everything kept out of sight and tidy. It's got a good enough space so I can pop on my favourite Hay storage box and new pen pot from Lilac Coast (see the love of blush pink coming through again?!)

I also got one of the IKEA Vaggis Noticeboard which was quickly DIY'ed with a marble adhesive paper when arriving. I didn't manage to do the perfect job, but luckily the pictures attached manage to cover up any little creases! Popping on a plant and some flowers makes it a little more like the space I long for.

What do you think of my new buys?


SHARE:

Wednesday, 18 February 2015

CREATE // A Valentines Table.


Whilst I'm not a huge fan of Valentine's Day, I do appreciate that it's a nice excuse to spend some quality time with a partner, sit down for a meal and spread the love around a little bit. Kane and I stayed in this year and ordered pizza (the best kind of Valentines day, if you ask me) so I didn't don a pretty dress or nice make-up, but I did make a bit of an effort to spruce up our dining table for the meal.

Of course, flowers are a must around Valentines day, so despite already having quite a few bunches dotted around the house, a couple from Kane himself, I decided to try out one of the Bloom & Wild bouquets, which arrived posted through my letter box! They come really well wrapped and made an absolutely beautiful set; I decided to split them up into a few different vases, no-one needs to have to peer over a huge bunch of flowers at dinner. I also bought a new vase from Henry's Future which I think is so simple and gorgeous, but it really makes the bright flowers stand out.

Candles are perfect for creating a nice, relaxed environment, plus everyone just seems to look better over candlelight, meaning I can get away with the lack of make-up! I added to my copper addition with this gorgeous lantern candle holder from Made With Love Designs, with a couple tealights it created such a lovely ambience. And, because it's not really Valentines without at least a couple heart themed items, I made sure my paper straws were well stocked up, even though it did seem a little odd drinking wine through a straw! Anything in the name of love, eh.

How would you create a loved-up dining table?


* I was kindly provided with a voucher from Furniture Choice for Not On The High Street to create this post.
SHARE:

Tuesday, 17 February 2015

COLOURLOVE // Blush Pink.


There's something about blush pink that has got me swooning hard at the moment. I gave my bedroom a mini makeover at the weekend (pictures to follow shortly!) and decided on a white, gold, pink and copper theme, so I'm looking for a couple pink options to add, other than the books and candles I already have. Ideally I'm just looking for some pillowcases and cushions, but I couldn't resist putting together a little board of all things beautiful in blush pink. I mean, that chair!

1. Blush! Candle Jar / Lily Flame, John Lewis.
2. Ira Floor Lamp / Made.
3. Ampersand Watercolour Print / Jessica Gully Design, NOTHS.
4. Sugar Paper Gold Dot Notebook / Rachel George.
5. Swivel Curved Chair / Softline, ABC Carpet & Home.
6. Pink Love Salts / Fig & Yarrow.

Are you a blush pink lover?


SHARE:

Monday, 16 February 2015

CREATE // A Gallery Wall.


One of the things I really disliked about the new house we bought were the frames on the walls. They looked old fashioned, and I just didn't really see the point in having them there, until I realised that if I wanted to remove them it'd probably involve a lot of time, effort, plaster and paint. So they stayed. I filled the smaller one with a couple secondhand wall planters I found, and decided I wanted to create a gallery wall with prints and frames. Usually when I buy prints I just go straight in, attacking the wall with nails, which usually makes a bit of a mess, so this time I decided to plan it out a bit more, and here are my tips for creating an easy, stress free gallery wall!

Decide on the prints: This is the fun part, buying! I decided I wanted some from Society6, and added in a Lloyd Loves one; I knew I wanted mine to be relatively simple, all in a similar style of frame, but you can get really creative here. I see people attach things to the wall with washi tape, use banners, but it's really down to your personal style. Also, I thought I'd mention that you may be charges customs when ordering from Society6, as it is based in the US. Mine arrived about two weeks ago now and so far I haven't heard anything about any charges, but I know people who have been charged around £15-20 in customs when ordering a few prints.

Buy frames to match: Being american sizes, the Society 6 prints were a little harder to find for. I managed to find a couple in charity shops that fitted well, but you can probably see a little border in the largest print background. This was another charity shop find but I think it works quite well with the colours of the print. I found all mine for pennies secondhand, but great options for frames are IKEA, Asda or Ebay


Plan it out: I played around with composition before I decided on the first one I did, which is what usually happens with me. Just using the floor and rearranging each print to see what works out best will save any upset rather than heading straight to the wall with a hammer and nails.

Measure: This was a really important part for me as I was trying to get them in the centre of a wall frame, but if you have an open space it isn't crucial. Even with measuring all the frames and spaces I still managed to get them about an inch too far on the left, but it isn't hugely noticeable unless you stand studying it!

Masking tape is your friend: An easy way to make sure you absolutely get the frames in the right place is using masking tape. Create boxes in the same measurements as the frames so you can see the design on the wall before hammering any nails, and also so you get the composition completely right with good spaces inbetween each frame.

It is easy enough really, but with a little time and planning it'll turn out perfect and mistake free! What do you think of my wall?

PRINTS I BOUGHT:
1. Beckoning Seas / Caleb Troy, Society6.
2. Thunder Only Happens When It's Raining / Fleetwood Mac, Lloyd Loves.
3. Watermelon Sunset / Caleb Troy, Society6.
4. Pineapple / Basilique, Society6.


SHARE:

Sunday, 15 February 2015

New Desk Details.


This is going to be a bit of a short and sweet post, but I couldn't resist sharing my latest stationery purchases. Now I know, I know, stationery is the last thing I need any more of but I some how convinced myself that I needed these items, and I kinda did.. Kinda.

First up I thought I'd get myself one of the Rifle Paper Co. Weekly Desk Pad; I used to have one from Paperchase but this is a much prettier one, and it's a great way to keep organized by having each day's activities planned out. I plan each day at the start of the week but it's easy to add anything in each day if something new crops up. I added another fancy Livework pen, they seem to be the only ones I manage not to lose, probably 'cause they're so expensive!

Since I started buying tiny bags that I can only fit the minimal amount in, I can't fit any notebooks in (see my logic?!) so I just had to buy a couple mini ones, again from Rifle Paper Co. so I can jot down anything I need to remember or blog post ideas I come up with whilst I'm out.

Have you made any recent stationery purchases?


SHARE:

Friday, 13 February 2015

Pink To Make The Boys Wink!


I'm not the biggest fan of Valentines day, despite being in a relationship; I find it all a bit forced, but I'm okay with sitting at home with my boyfriend, making a meal, and perhaps donning a bit of something pink or red to stick with the theme! I've decided to go with pink this year as there's a few new items on my dressing table that I've been absolutely loving.

During the day, I'll be donning a pink lip; I currently have two favourites, so it'll be a toss up between them! The NARS Yu Satin Lip Pencil is absolutely gorgeous; so creamy and pigmented, it really just glides on the lips. However, if I'm planning on doing any eating or drinking, it can be a bit of a pain to keep reapplying. So a long lasting option is the Bourjois Ole Flamingo Velvet Lipstick, which is a pretty identical colour but dries matte and sticks around like nobodies business. 

For the evening, I'd probably tone down the lips and go for a brighter blush instead. If I do choose a pink I usually always go for Topshop Flush Cream Blusher; I love how it applies, it looks so fresh and pretty on the cheeks, and has fantastic lasting powder too. Another pretty one is from No7, although has been now discontinued. It's more of a deeper fuschia shade, but applies and blends really well.

I've been spritzing on Roger & Gallet's Rose Imaginaire* fragrance most days recently, and I'm so in love with it. I was a little worried from the name that it would be a bit overpowering on the rose, but it's a beautiful mix with tangerine, strawberry, violet, jasmine, sandalwood and patchouli. There's actually a real elegance to the scent, I can't stop myself from using it at the moment. I've been pairing it with their Rose Hand & Nail Cream* too which has the same scent, now I need the body lotion so I can cover myself top to toe in it!


Do you have any pink favourites you'll be wearing this Valentine's?


SHARE:

Wednesday, 11 February 2015

A Tropic Skincare Duo.


As an oily skinned gal, two of the skincare items I just can't live without is a good clay mask and an oil, so I'm always adding new ones to my collection. I've only recently heard about Tropic Skincare, but immediately made the connection to an old The Apprentice episode after realising who the owner was. I'm seriously impressed with their values of creating all the products with natural ingredients, as well as being vegan and cruelty free, and I've been loving testing out a couple items.

First up is their Radiance Clay Mask*, which I have to admit, I'd popped on within about 30 seconds of it hitting my door mat. It comes in a pot with a handy little wooden spatula, which I thought I would just ignore but it actually makes application really easy and a little cleaner too! I apply a thin layer and it does take around 15 minutes to fully dry, when I wash off with a flannel or muslin cloth in circular motions, which helps to exfoliate the skin as it goes. It contains fruit acids and willow bark, a natural source of salicylic acid, as well as green clay and tea tree, making it an absolute dream for anyone with oily or blemish prone skin. Afterwards my skin looks so bright and clear, without it being at all drying. It's become my new favourite clay mask, which is a hard feat after loving the Superfacialist one for so long!

If you've been around here for a while, it's likely you've read my love of a facial oil as part of my evening skincare routine. With regular use I find my skin looks clearer, a more even tone and reduced blemishes, as well as looking bright, and the Organic Facial Elixir Oil* does this perfectly. It comes in a rather swish glass bottle, and I probably need around 4 drops to cover my entire face and neck; it doesn't feel at all greasy, and sinks in nicely. It has a combination of different oils (moringa, rosehip, jojoba), and these somehow combine to create a bit of a marzipan scent, which is nicer than it sounds!

For a first experience of Tropic Skincare, I'm seriously impressed. I love using natural skincare, and I'll always support brands that go down the cruelty free route, so I'm looking into more of their products now. With regular use of both of these my skin is looking so much clearer, brighter and (almost!) blemish free, a couple cleansers and toners are on my to-buy list now!

Have you tried anything from Tropic Skincare?


SHARE:

Tuesday, 10 February 2015

Avenue 32 Wishin'.


Every once in a while I have a little peruse on a luxury website and make a 'what if money was no issue' wishlist, and today it's one from Avenue 32. Whilst I may splurge more on higher items of make-up, sadly my bank balance isn't quite there yet to warrant purchasing from any clothing other than from ASOS, H&M and charity shops, but a girl can dream, hey?

BLK DNM | Black Skinny Jeans 8, White T-Shirt 2
I quite regularly hear about BLK DNM having some of the best basics around, and for me you can never go wrong with a pair of black skinny jeans and a white basic tee. I've always longed to be one of those girls who look so effortlessly chic in these sorts of outfits with a pair of ballet flats and a slick of red lipstick, sadly it's a look I haven't quite mastered yet.

SHRIMPS | Burnt Orange Agnes Jacket, Pink Pablo Clutch
I'm a big fan of a 70s look so I'm quite enjoying the resurgence it's seeing in fashion recently. I absolutely love this faux fur jacket, the colour is gorgeous and I like how the collar seems to clash with it. It'd be a perfect pair with the faux fur clutch too, I could see an outfit like this heading to fashion week.

ALEXA CHUNG FOR AG | Allure Denim The Kety Skirt
Unless you've been living under a rock, you should really have spotted the latest Alexa Chung collab and people talking about THAT denim dress. I would have included it myself if I'd have thought in any way, shape or form it would look remotely decent on me, so I went for the safer option of the denim a-line skirt instead. I seriously need to get my hands on one of these, it'd be a perfect staple throughout spring and summer.

KAREN WALKER EYEWEAR | Tortoiseshell Harvest Sunglasses
What's a wishlist without a pair of sunglasses? I can't resist any tortoiseshell pair and this pair is no different, I love the oversized shape too.

Are you an Avenue 32 fan?


SHARE:

Friday, 6 February 2015

A Lush Haul.


I've had a cold for the past few days, which for me means one thing; baths, and lots of them. It's been a while since I treated myself to a few items from Lush so I thought now was the opportune moment. I hadn't been in since before Christmas so I was drawn in by the prospect of new releases and all things heart shaped.

The first item I picked up was the Prince Charming Shower Gel. It's a lovely sweet one, although possibly not as sickly sweet as Snow Fairy. I couldn't actually smell it that much due to a blocked nose, but the prospect of marshmallow root, vanilla and pomegranate juice was too good to resist. One of my favourite toners is the Tea Tree Water, I find tea tree really works well on any blemishes I have so a quick sweep of this onto my face with a cotton pad twice daily helps to ease and soothe any breakouts.

Then of course, it was straight over the bath ballistics and bubble bars. I picked out a couple from the Valentines range, including Heart Throb which is a gorgeous red and gold glitter number with lots of essential oils and shea butter in for some more lazy moisturisation. A similar one I got is the Lonely Heart Bubble Bar which has a gorgeous spicy and citrus scent, I thought it would be perfect for a bit of a pick-me-up from this cold!

The Floating Flower Bath Bomb is also from the Valentines range, I've seen a video of this one floating on top of the water, and the colours it produces just look beautiful. As you'd expect it has a really lovely floral scent too. And finally, I had to repurchase The Comforter Bubble Bar, which is probably my favourite from Lush. It just has such a nice blackcurrant scent and there's just something about it which keeps me reaching for it time after time.

Have you tried any of these?


SHARE:

Thursday, 5 February 2015

Instagram Tips & Tricks.


If there's one app I am well and truly addicted to, it's Instagram. You can keep Facebook, I could probaaably live without Twitter (at a push), but Instagram is just the one for me. And whilst I'm not an expert, I thought I'd throw in some of my tips & tricks and how I edit all my images.

Download some apps:
There was quite a long time when I just used the filters available on (Valencia, anyone?) but a few months ago I decided to download a couple apps, and now I couldn't be without them to edit my photographs. My most used is VSCOcam which has so many different filters, most of which are free but you can buy some collections for around 99 cents; my favourites are C1, F2 HB1 and HB2. I also have Afterlight which has some filters but I mostly use for adding little bokeh effects or changing the shape of the image.

Take more than one:
I do this with all of my images, but it's useful to take a few. Change the angle you're snapping from, switch up the composition, add in little cute extras, then go over and see which is your favourite.

Figure out what's popular for you:
The most liked images, without a doubt, are of my home. They also happen to be the ones I love sharing the most, so my instagram is mostly interiors. The subject doesn't always have to be the same but I think trying to create a theme or certain look to your Instagram page is always a good way to go.

Be present:
It's important not to spam people but I try to update at least once a day to keep some new interest on my page, I'd say up to 2-3 uploads a day is probably about the most preferable. It's also important to get out there and like other people's pictures. It's the same with most sorts of social media, the more present you are, the more people will notice.

Use natural light, if you can:
Natural light isn't the most important, thanks to all the editing apps we have available, but I still think natural light is preferable to artificial. There's something about the sharpness and clarity that just cant be faked!

Do you have any Instagram tips to share? You can find me at @ladyliquor!


SHARE:
Blogger Template Created by pipdig